Learn How to Use OneNote to Share Notebooks, To-Do-Lists, and More
Sharing digital notes is an excellent way of distributing notebooks, to-do lists, shopping lists, home renovation notes, Christmas party lists, and so forth with your friends and family. The only problem you may have is persuading them to sign up for an account on your preferred service to receive all note-sharing capabilities.
There are several services offering digital note sharing, but most likely, you and everyone you share with have a Microsoft account. This makes sharing on OneNote much easier.
To Begin
First, download from the Windows Store or use the web app version at Office.com. If you have Windows 10, the store version is already pre-installed.
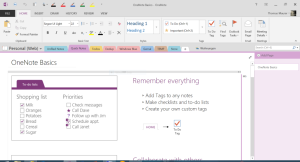
After signing in, if you are using OneNote for the first time, you will see a “Personal” notebook. We want to make another notebook to store our family stuff because it is wise to maintain your own personal notebook.
OneNote works in the same way as a physical notebook with tabs does. A notebook itself is a gathering of notes gathered together, then there are section (tabs) to separate subjects such as gift ideas, shopping lists, recipes, gardening plans, etc. Finally, each tabbed section has actual pages where the notes are kept.
Create Notebook
To create a notebook, select File in the upper left corner, then select New. A box now opens letting you name your new notebook. You can name it “My Notebook” or use your imagination to create something. After you enter this, select Create Notebook.
Within a couple of seconds, OneNote displays an invite for you to share this notebook you just created with others. Since we want to prep ours prior to sharing, we can say Not now. OneNote now opens up the notebook you have just created, which has one tab named “New Section 1” at top. Go to the tab and Right-click, then select Rename, enter “Shopping lists” and select Enter. Select the “plus” sign located next to the first section to create additional sections.
The section for shopping lists has a list of pages running down the notebooks right side. There is one untitled page which you can rename by default.
Adding a date to the name helps to tell you old from new notes from a glance. To select it, click on the main part of the page. To make a list that has check boxes, choose Home > To Do Tag. Enter the list’s name and click Enter following each item for the creation of new checkboxes.
To begin sharing, have the notebook, section, and your first page aligned. Select File > Share > Invite People, and enter the email addresses of those you want this list shared with, making sure “Can edit” is stated next to these addresses in the drop-down menu. Check the box stating, “Require user to sign in before accessing the document,” just to be safe. Finally, click Share.
Now, it is simple for everyone to create and share notebooks with OneNote.